Embellished Wings!
I have finished Clara's butterfly wings. In my previous butterfly wings post, I described how I made the wings. This time I'll describe how the sequin trim is attached. Many thanks to Luckylibbet in the forums over at Pattern Review for coming to my overtired brain's aide with suggestions for attaching sequin trim!
First, I removed about four sequins from the end of the string. I then took a piece of thread and tied a knot around the string to keep any other sequins from shifting. I moistened the string with fray stop (but I am not certain that did anything), folded the string under the sequin trim and took another thread and tied the tail to the sequin trim.

If you look really closely, you can see a faint pink chalk line drawn on the fabric. I then dotted sections of the line with glue.

And pressed the trim into place. This really held remarkably well.

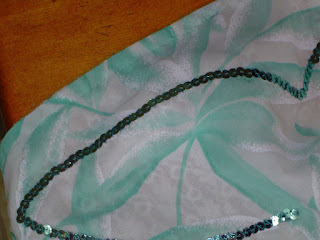
One side all glued and drying. Once it was a little dry (though I probably should have waited longer, but I was trying to finish while Clara was napping), I zigzagged over the top of the trim using my widest setting. If you look closely at the photo below, you can see the stitching. Unfortunately for me, I didn't wait for the glue to dry enough and now I have a presser foot that has glue smeared on the bottom.

First, I removed about four sequins from the end of the string. I then took a piece of thread and tied a knot around the string to keep any other sequins from shifting. I moistened the string with fray stop (but I am not certain that did anything), folded the string under the sequin trim and took another thread and tied the tail to the sequin trim.

If you look really closely, you can see a faint pink chalk line drawn on the fabric. I then dotted sections of the line with glue.

And pressed the trim into place. This really held remarkably well.

One side all glued and drying. Once it was a little dry (though I probably should have waited longer, but I was trying to finish while Clara was napping), I zigzagged over the top of the trim using my widest setting. If you look closely at the photo below, you can see the stitching. Unfortunately for me, I didn't wait for the glue to dry enough and now I have a presser foot that has glue smeared on the bottom.


Comments