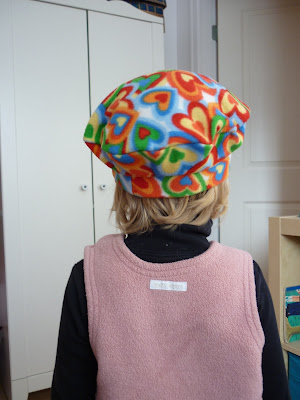
Fleece Beret
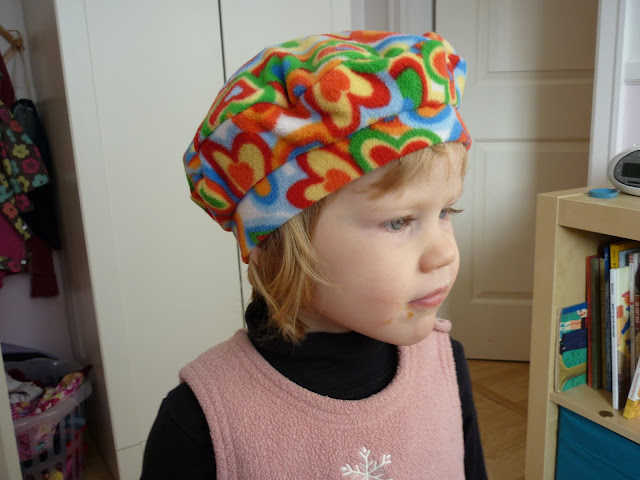
Please excuse the peanut butter face.
I have a bit of blogging catch-up to do! I'm going to start with this fleece beret/tam. This little hat is a great way to use up those pesky remnants of fabric that are too big/"useful" to throw out, but seem too small to really make into anything.
To make a pattern for a hat for a child with a head about 19" - 21" in circumference (in my house, the hat fits the 3.5 year old and the 5.5 year old - but the 5.5 year old has a slender bone structure), you first you make a circle with a radius of 3 1/8" or thereabouts. The idea is to dust off your high school math skills and make a circle with a circumference that equals the circumference of the child's head. Thinking back to those math classes, you might remember that circumference, C=2Pi r. So, if the circumference of your child's head is 19", then your radius is figured by dividing the circumference by 2Pi: C/(2Pi). (Sorry, I can't figure out how to insert the symbol for Pi). In my case, that's a smidge over 3 inches and since the fabric being used is stretchy, there's no use in quibbling! (I used a scrap of a sheet that I've kept for muslins to make my pattern.)
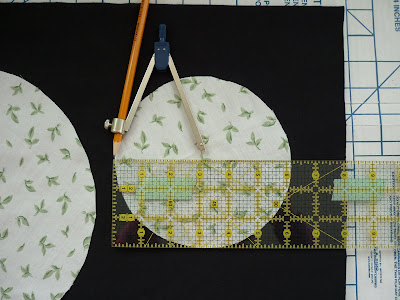
Then make one circle with a radius about two inches larger than the radius of the smaller circle. The difference between the lengths of the radii controls how big the hat appears on the child's head. I just guessed that two inches would be fine. For a bigger head, you might want to make the difference larger.
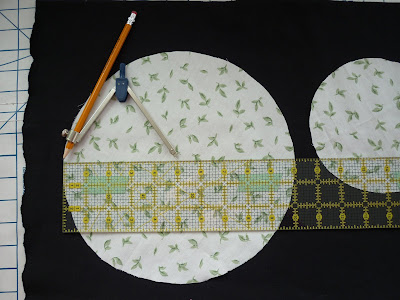
Next you cut a rectangle of fleece. My rectangle was 19.5" long by 3" wide. That long measurement comes from the head circumference plus seam allowances. I used about 1/4" seam allowances. This rectangle will be the hat band. Edited to Add: Make sure the long measurement follows the stretch of the material!
If you want to underline the hat, cut out the large circle and large O from your choice of fabric, just be sure that the fabric has similar stretchiness. Now attach the underlining to the outer fabric wrong sides together along the cut edges. I used a three-step zigzag. You could also just use a simple zigzag.
Now sew the outer edges of the large circle and the large O together, with right sides together. I used a very narrow (.5 mm) regular zigzag with a stitch length of 3 mm. Flip it right side out and admire your work! You are almost done!
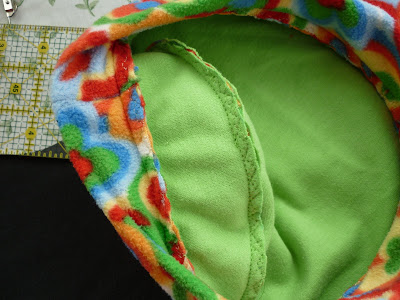
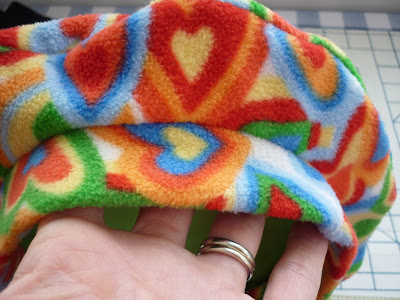
Now take your rectangle of fleece and sew the 3" ends together (right sides together). Fold the loop so that the wrong sides are together, and edge stitch with that triple-step zigzag. Look at the hat band in that photo just above to help you.
Next, divide the inner circle of the hat into fourths, marking those spots with pins. Also divide your hat band into fourths and mark those spots with pins. Attach the hat band to the hat, right sides together, matching up the pins. Sew the pieces together (again with that narrow (.5 mm) zigzag). You should have something that looks like this:
Good work! If you want, now is the time to get a little crazy with an embellishment and stitch it onto the hat. This particular fleece is a bit busy for an embellishment. But I made a plain lavender one for a little friend's birthday, and it required a butterfly.
I hope this tutorial is useful. The hat really does go together quickly. It takes about as long to make one as it did for me to explain it all!


Comments